Ariadne during winter 2022-2023
- 12 minutes read - 2440 words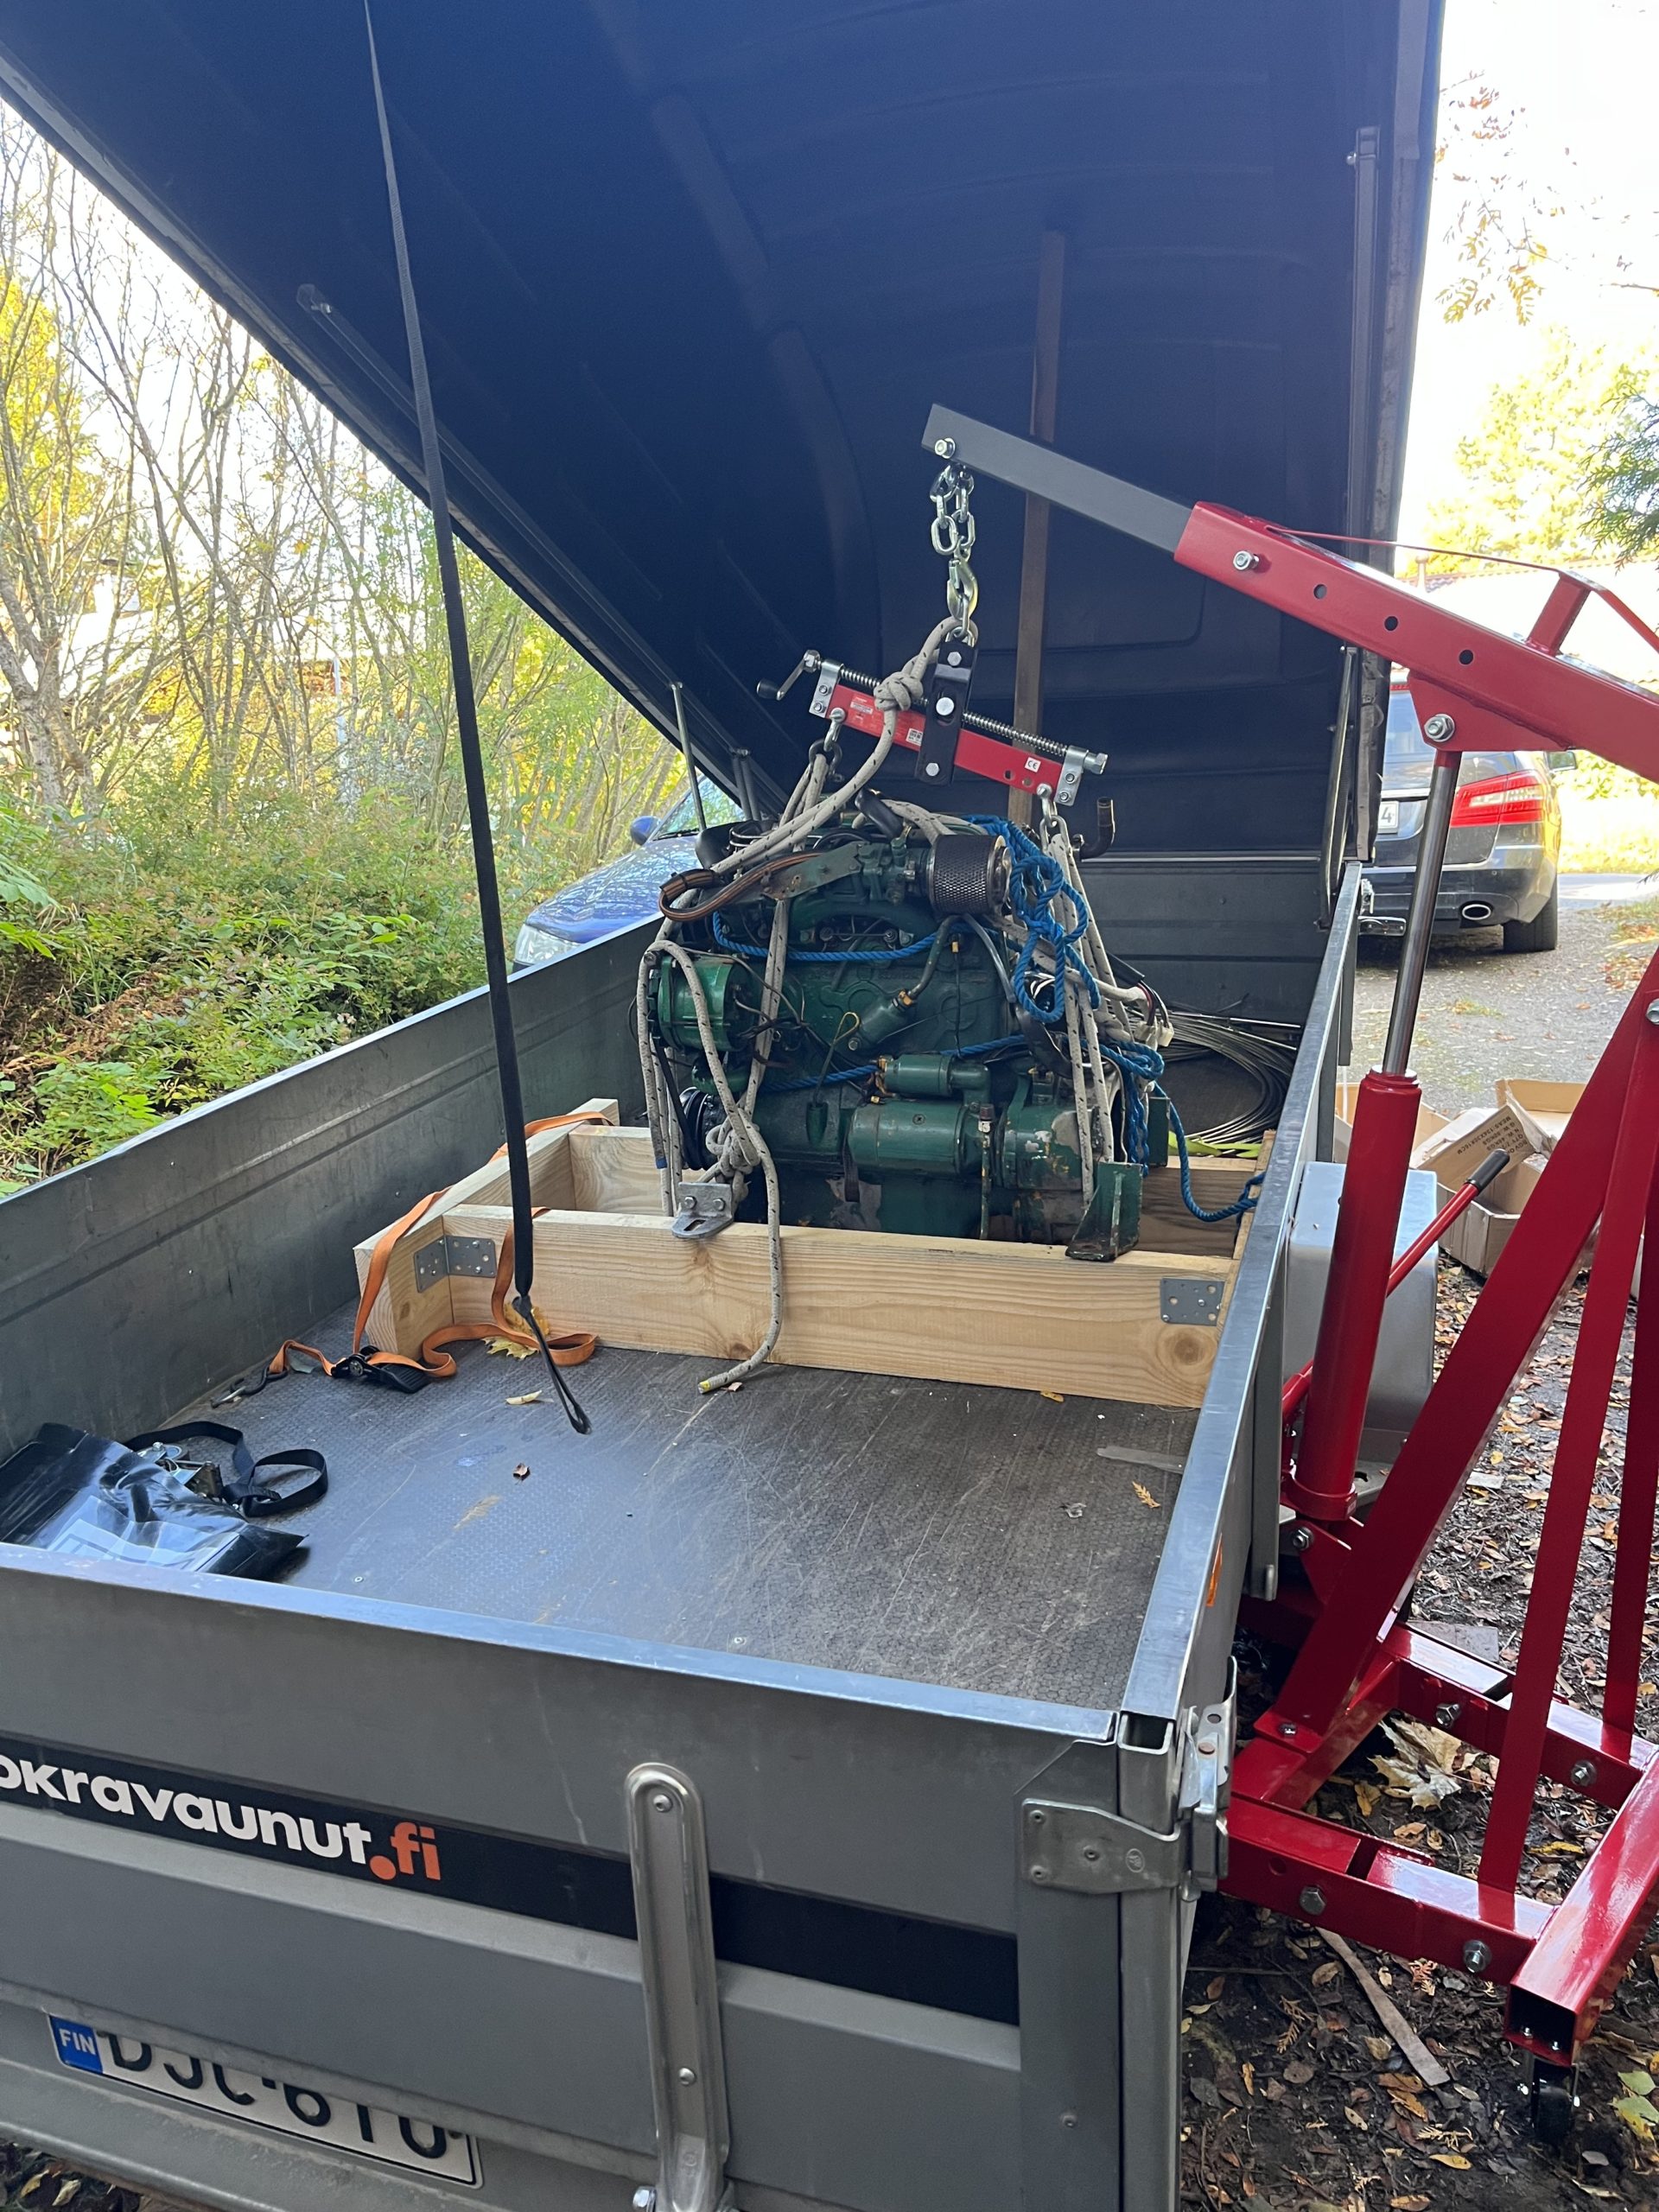
OM636 siirtyy talliin
OM636 moving to garage
The engine went into the trailer when Ariadne was lifted and ended up in Inkoo. Before moving it to the garage, I washed it with a pressure washer because it had accumulated so much dirt over the decades.
The purpose was to find out the condition of the engine first and then replace the necessary parts. It started with compression measurements. I first measured the pressure with a Chinese miracle, i.e. a traditional mechanical pressure gauge with a non-return valve, but the gauge showed zero all the time. Oh yeah. I switched to the right brand multimeter and its pressure sensor and got good enough readings when I cranked the engine at the start. The start, however, took more power than the car’s Auxiliary Start Cables willingly agreed to transmit, which means the clips started to glow…. I bolted the starter cables of Ariadne and the smoke disappeared and the engine started spinning. I got indicative pressure values - the engine was cold - and by interpreting them, it seemed that the fourth cylinder was slightly worse in pressure than the others. Its pressures were 20% below the average of the others.
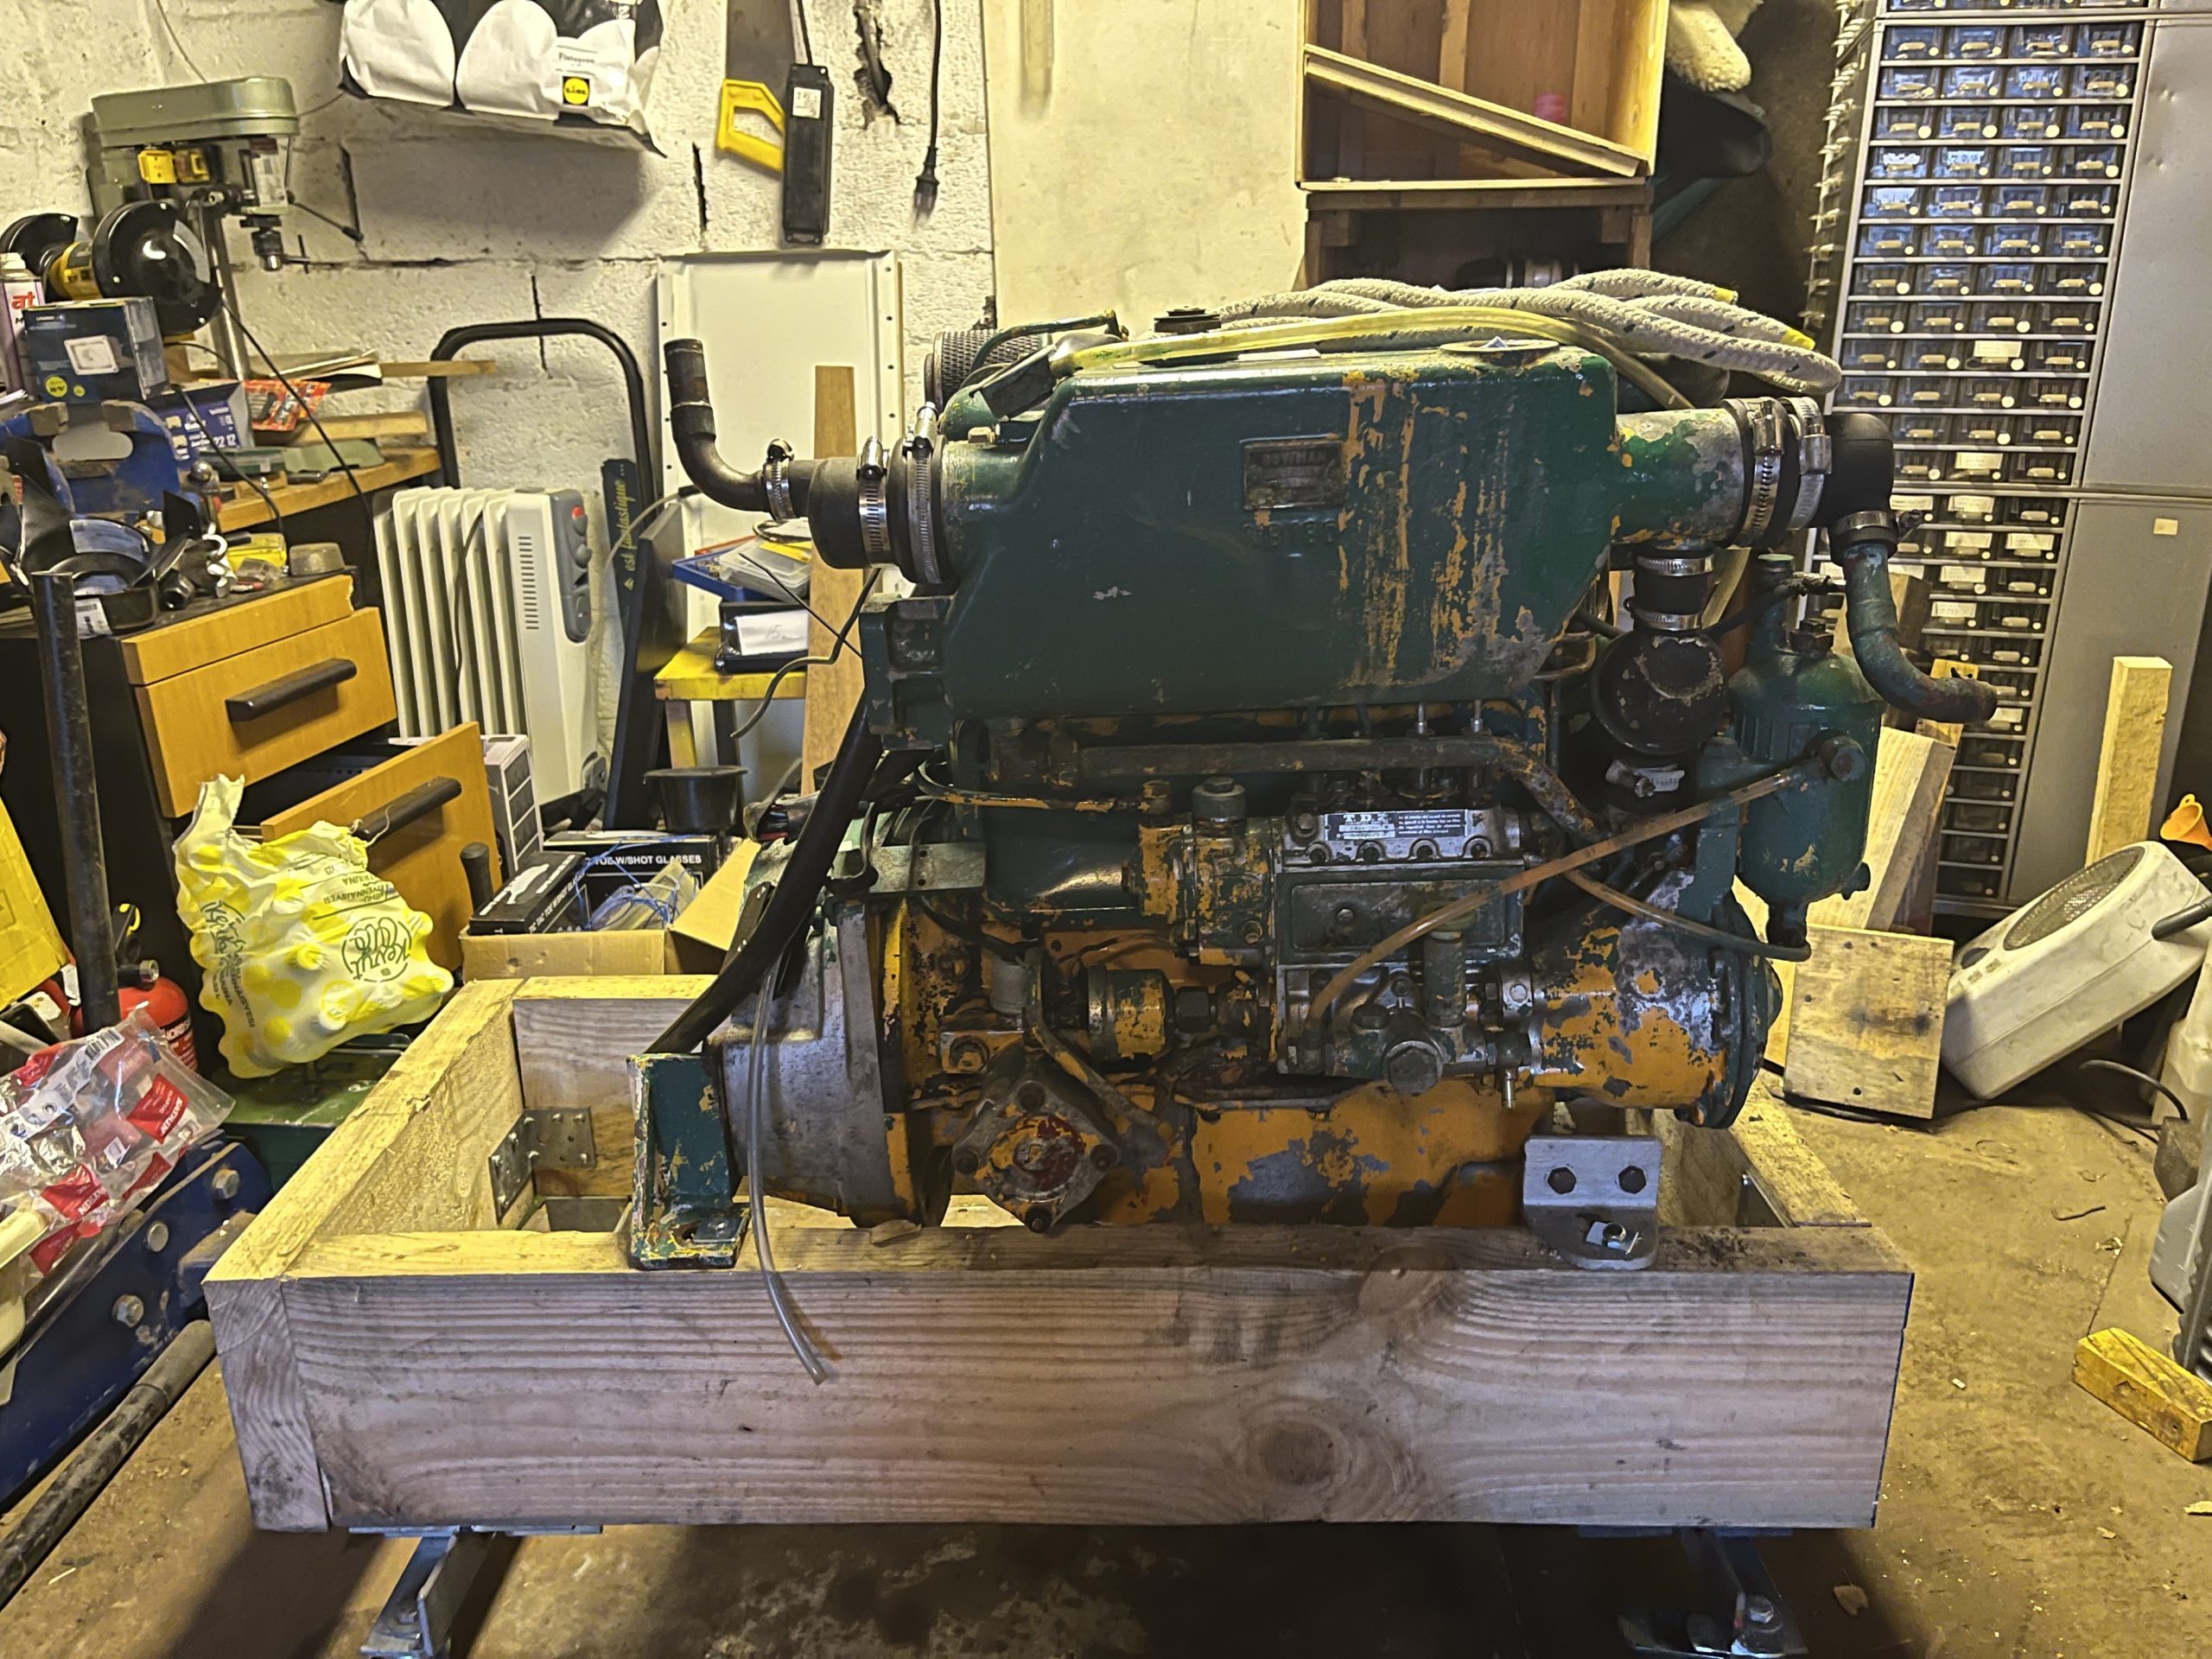
OM636 in the garage
I started the disassembly by draining the oils and coolant and after that the garage floor started to fill with various engine parts such as the heat exchanger, intake manifold, starter, alternator, oil pipes, injection pump, its pipes and nozzles.
When all the external parts were off, it was time for the cylinder head. At first, I tried to open the cover bolts with a standard socket wrench, but when turning the first bolt, I decided to use an impact wrench - a Makita one. The job became light and the bolts opened easily, smarter not harder.
So far the engine had been on top of the cradle I had made. Dismantling required a slightly different cradle and I ended up getting a turnable engine cradle from Motonet on which it could be rotated. For that, the flywheel and its housing had to be removed because the engine was bolted to the cradle through the bolt holes in the housing.
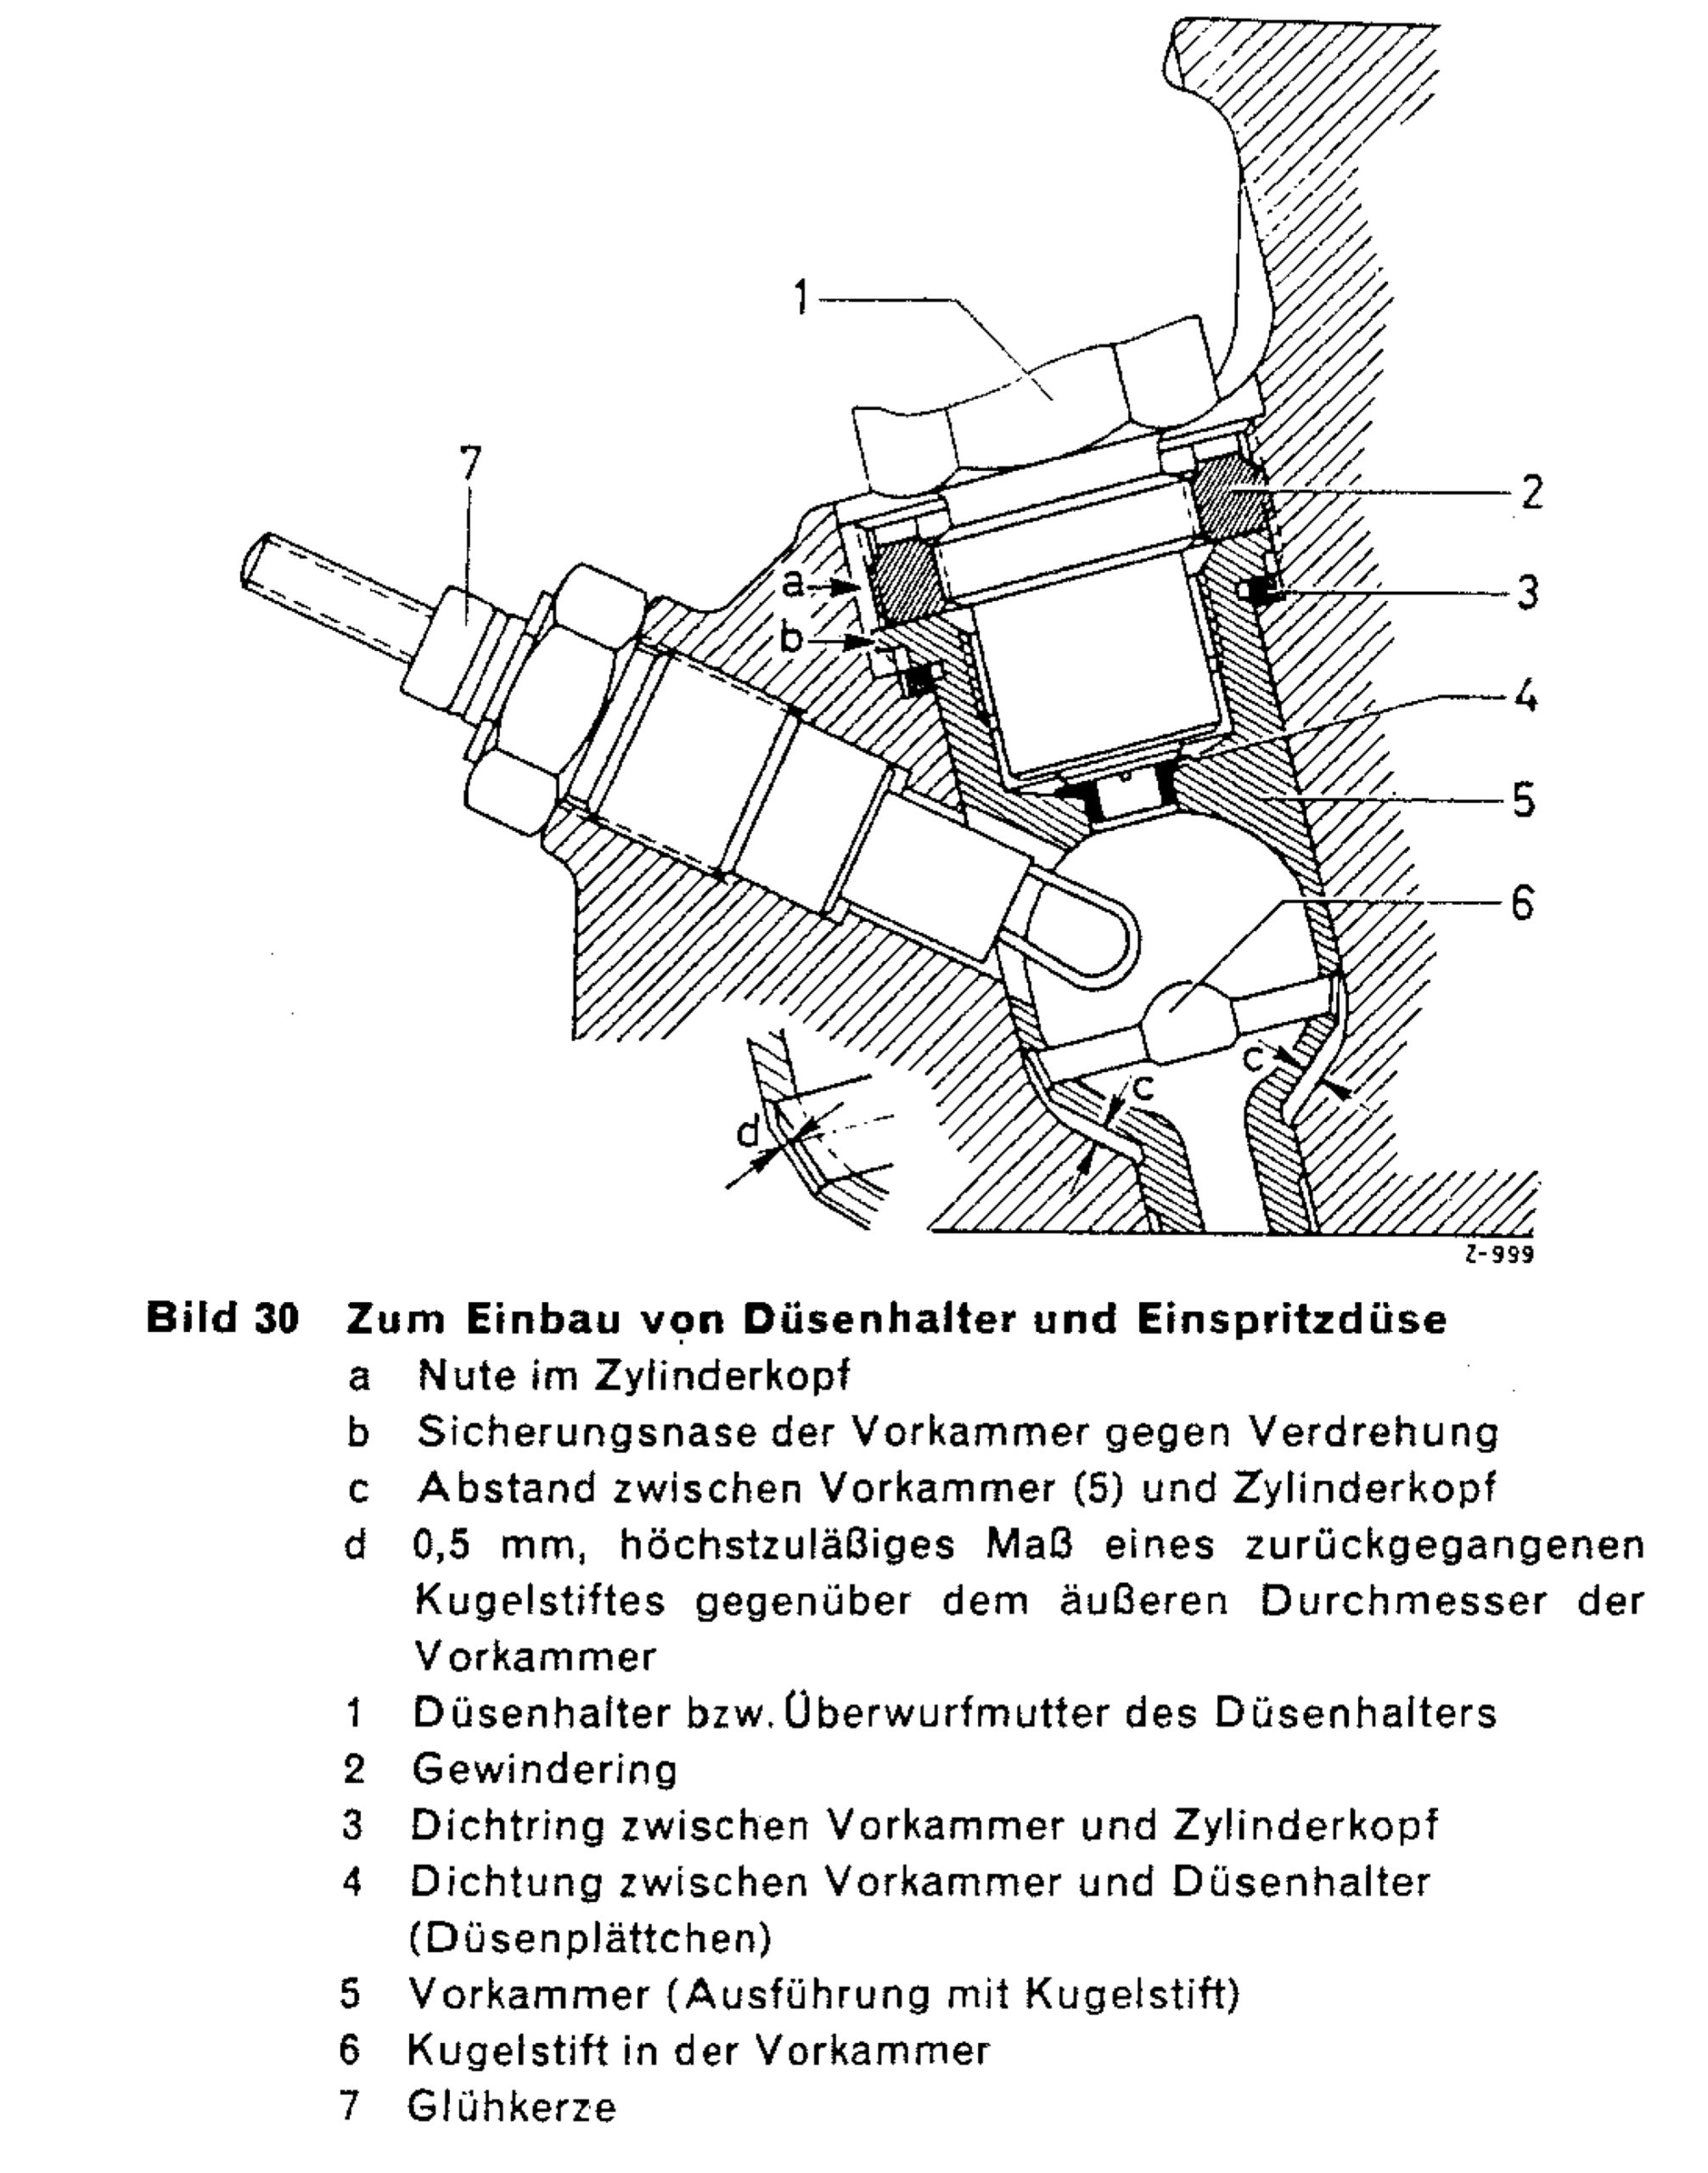
Vorkammer structure
After the cylinder head came off of the cylinder block (after a slight force), it was the turn of the cylinder pre-chambers on the cylinder head. Older diesel engines are typically pre-chamber diesels where fuel is injected into a small pre-chamber and combustion starts from there, unlike in new direct injection diesels where fuel is injected directly into the main combustion chamber. There were, of course, special tools for removing the pre-chambers and the threaded rings that held them in place. I had already put them in the shopping cart in the German Unimog online store, but when I couldn’t find Finland as the delivery address, I looked into the delivery conditions in more detail. Delivery to Germany only. Do I order and agree with the merchant that, for example, DHL or Fedex will pick up? Sounds complicated and laborious. Work trip to Germany? It’s hard to even come up with an excuse to travel. Do I drive back and forth to Germany in style for Ariadne’s restoration gigs with my 406 to Hamburg? Not exciting. Where else could you find a puller with an external thread M22x1.5mm for the threaded ring of the OM636? ebay.de? Yes. Ordering Vorkammer Gewindering ausdreh Werkzeug OM 615,616,621,636. It was a pity that the pre-chamber removal tool was nowhere to be found, of course it had a different thread for extraction. After a week, I picked up the package I ordered from Lantis and the tool worked well. The threaded rings opened and Makita’s 1000Nm impact wrench turned out to be the right tool again, otherwise nothing would have come of it. One of the rings was stuck so hard that it got little reformed and I have to order a new one.
The threaded rings were gone and now the pre-chambers had to be removed. The British OM636 guru also offered “sorry-no-such-tool” when I asked about the tool from him, but said that they should come off with a light tap. I didn’t even try it. Couldn’t find a pre-chamber removal tool and nothing else - not even bolts - with a matching M22x1.0mm thread online. No search results. Until finally. I found a scooter flywheel puller kit on Alibaba that seemed to have drive sockets with the right threads. However, ordering from China didn’t inspire me in the end, and luckily I found a similar series in Motonet’s selections when I was looking for special tools for the scooter engine there.
The next day, I drove to Motonet along the work route and picked up the set in question and after I got home, I wen to the garage to try it out. The puller socket fitted nicely into the internal thread of the prechamber. Good. However, the pull-out kit I purchased assumed that a bolt is screwed into the inner hole of the pull-out socket and when it is tightened all the way to the bottom and continued to be tightened, the sleeve rises. In my case, the sleeve should be lifted up by leaning on the outside of the hole and not on the inside, and for that I tried to see if the socket and the pre-chamber would fit inside the 30mm socket when the extraction bolt that came through the socket and rested on its top. Works. The pre-chambers were no longer attached to the cylinder head by anything other than 40-year-old rust, and they came off quite easily, and Makita’s nut driver wasn’t even needed.
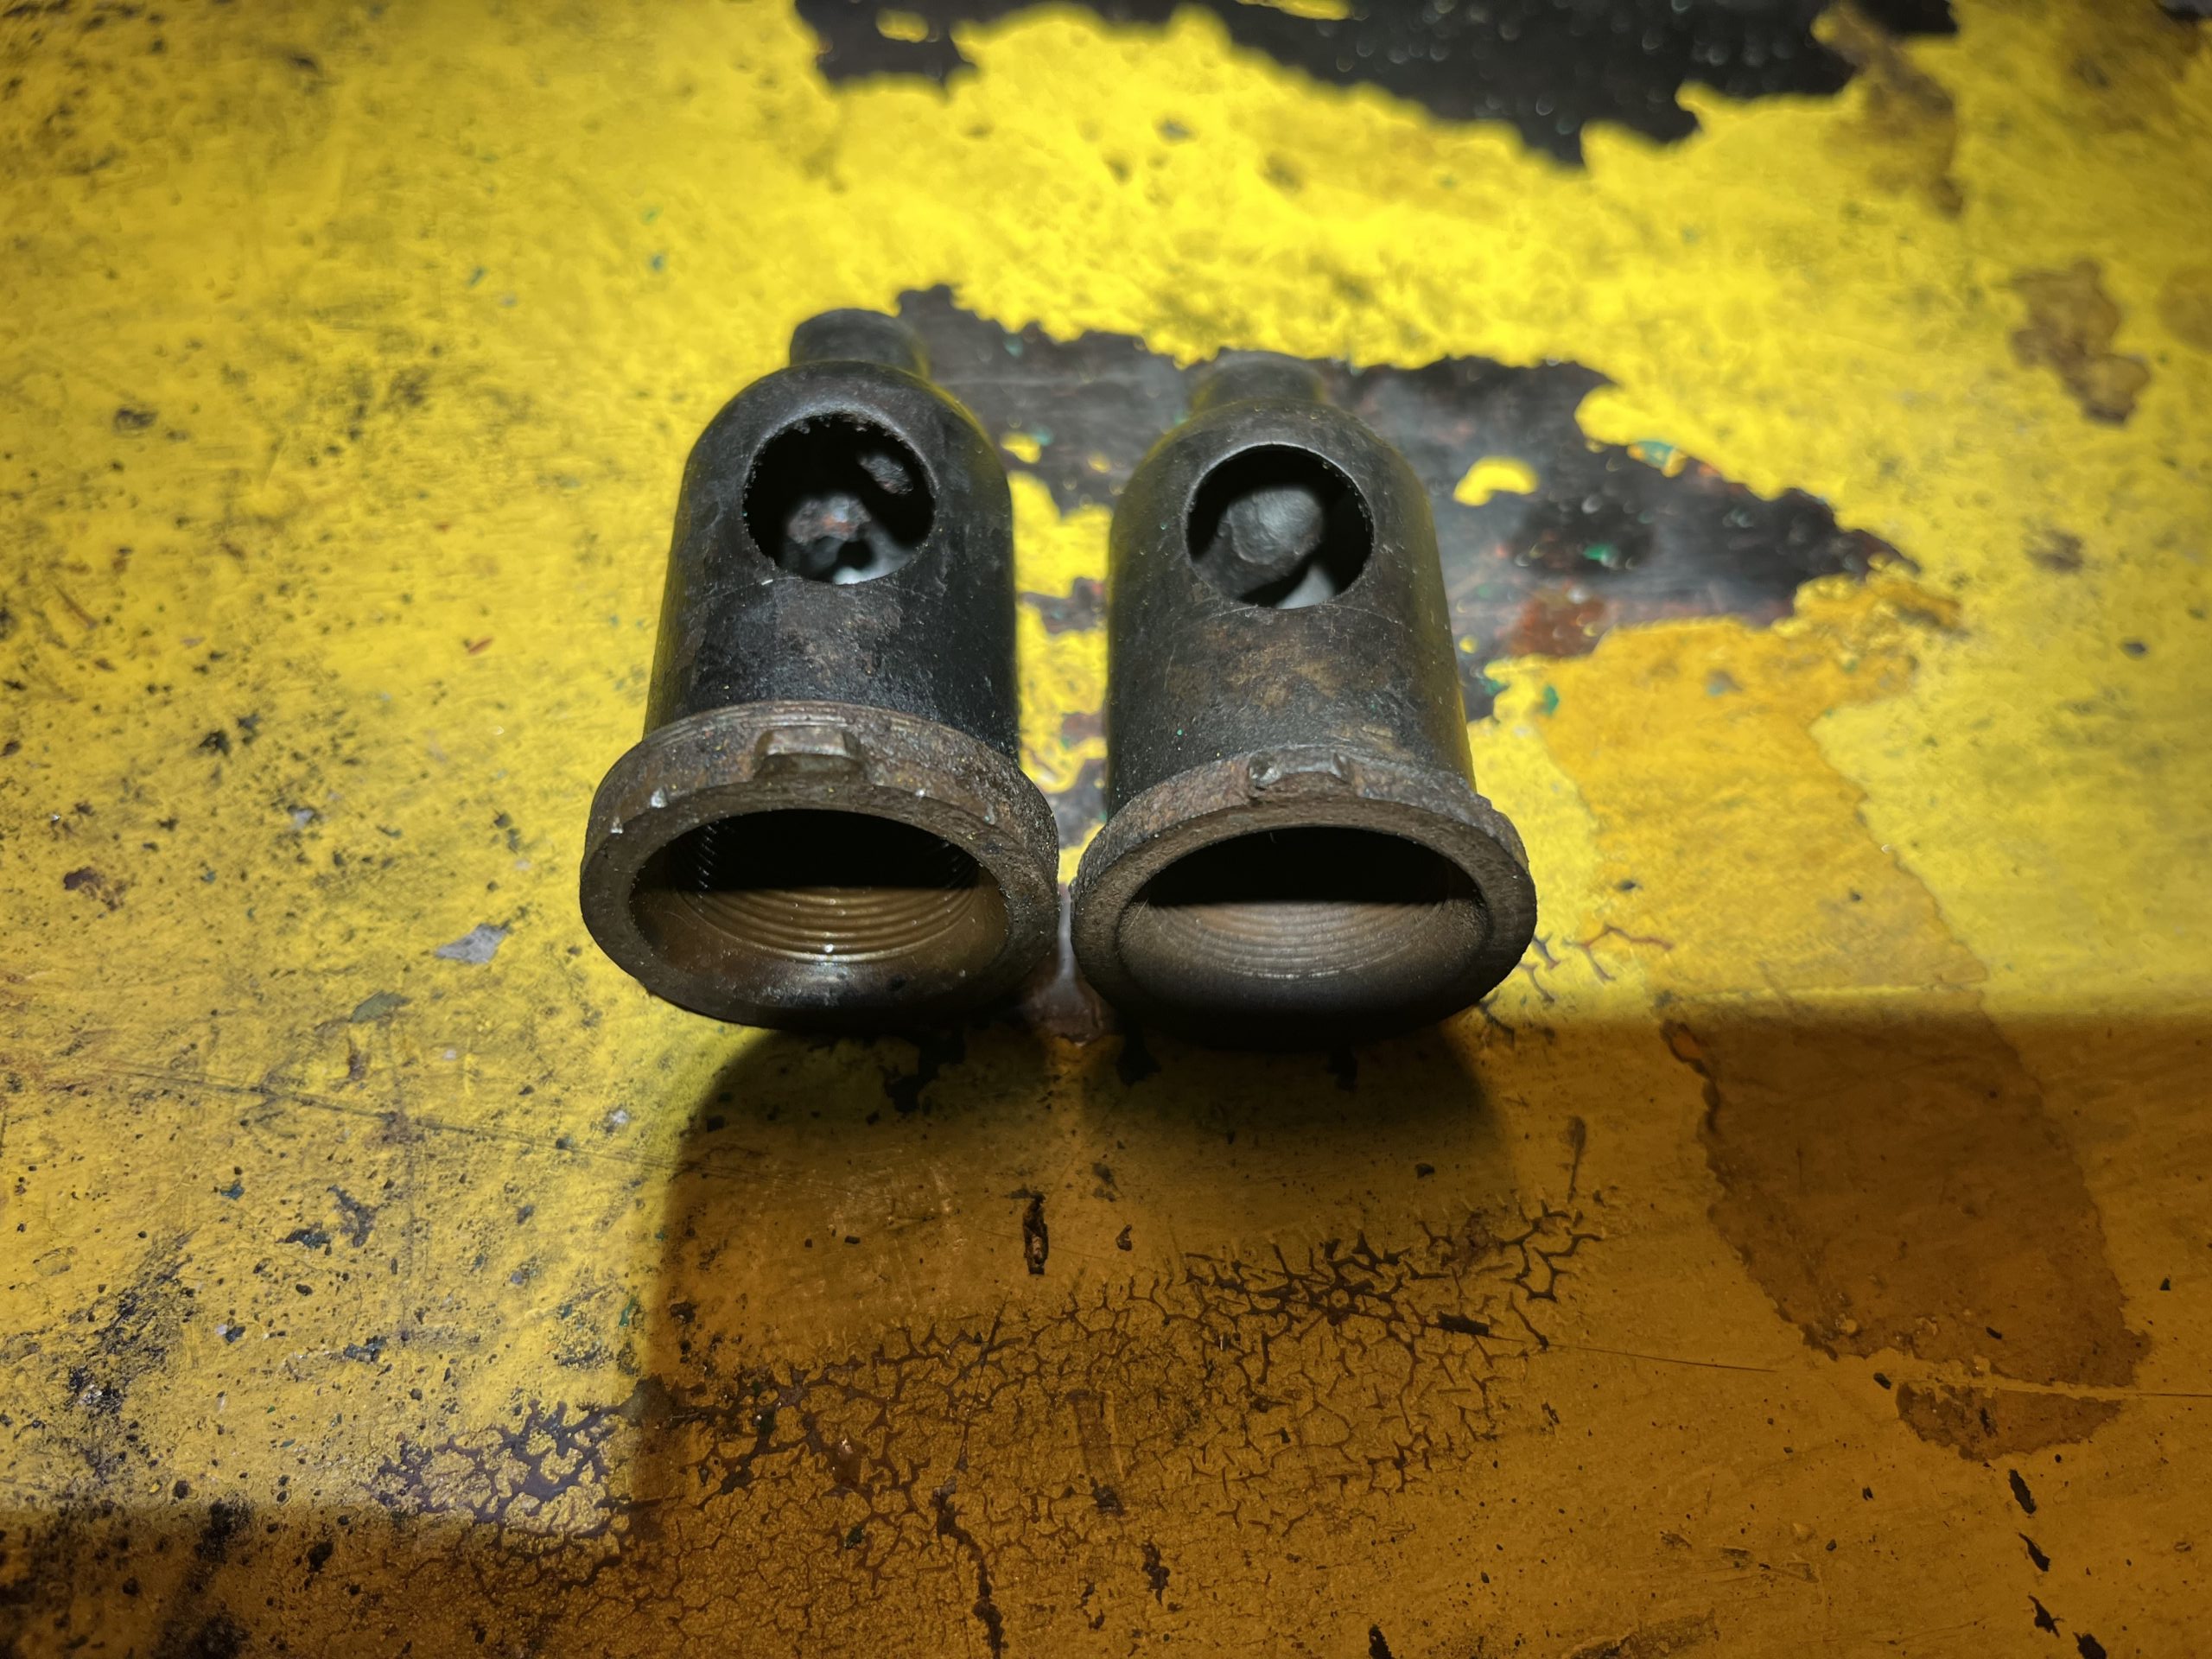
Removed vorkammers
In order to facilitate ignition and improve combustion, the pre-chambers have a small steel ball in the transverse bar towards which the fuel is sprayed and which collects heat during the annealing at start-up (see picture above). From the fourth cylinder, i.e. the most cabon build-up cylinder, the ball was almost gone, in the second it was in half and in the others it was still in place. Really weird. The missing part of the ball was not even found on the top of the piston and there were not too many traces on the piston top, so it had apparently ended up through the exhaust valve. One more line was added to the shopping list, two prechambers - if you can find them somewhere. I removed the valves, which were all fine, and left the cylinder head to wait for the workshop.
All that was left was the cylinder block with the oil pan, crankshaft and camshaft as well as the pistons and oil pump in place. I turned the engine upside down and pretty soon after removing the bolts the oil pan came off with a little knocking and the crankshaft was visible. Next, the connecting rods came off the crankshaft and after that the crankshaft bearings and I lifted the shaft off. I pulled the pistons and connecting rods off and only the camshaft was in place in the cylinder block. The cylinders need light drilling/honing, as the previously mentioned fourth cylinder was the most worn, it felt a small shoulder - a couple of tenths - at top dead center.
At this point, I throw the ball to the machine shop, which in the near future will go through the cylinder head and block and do its part, i.e. checking the head, grinding the valves and drilling the block. I hope you don’t have to start changing the cylinder tubes, because the availability seems pretty much 0. Strange, because the engine is only 44 years old.
Lots of work to be done
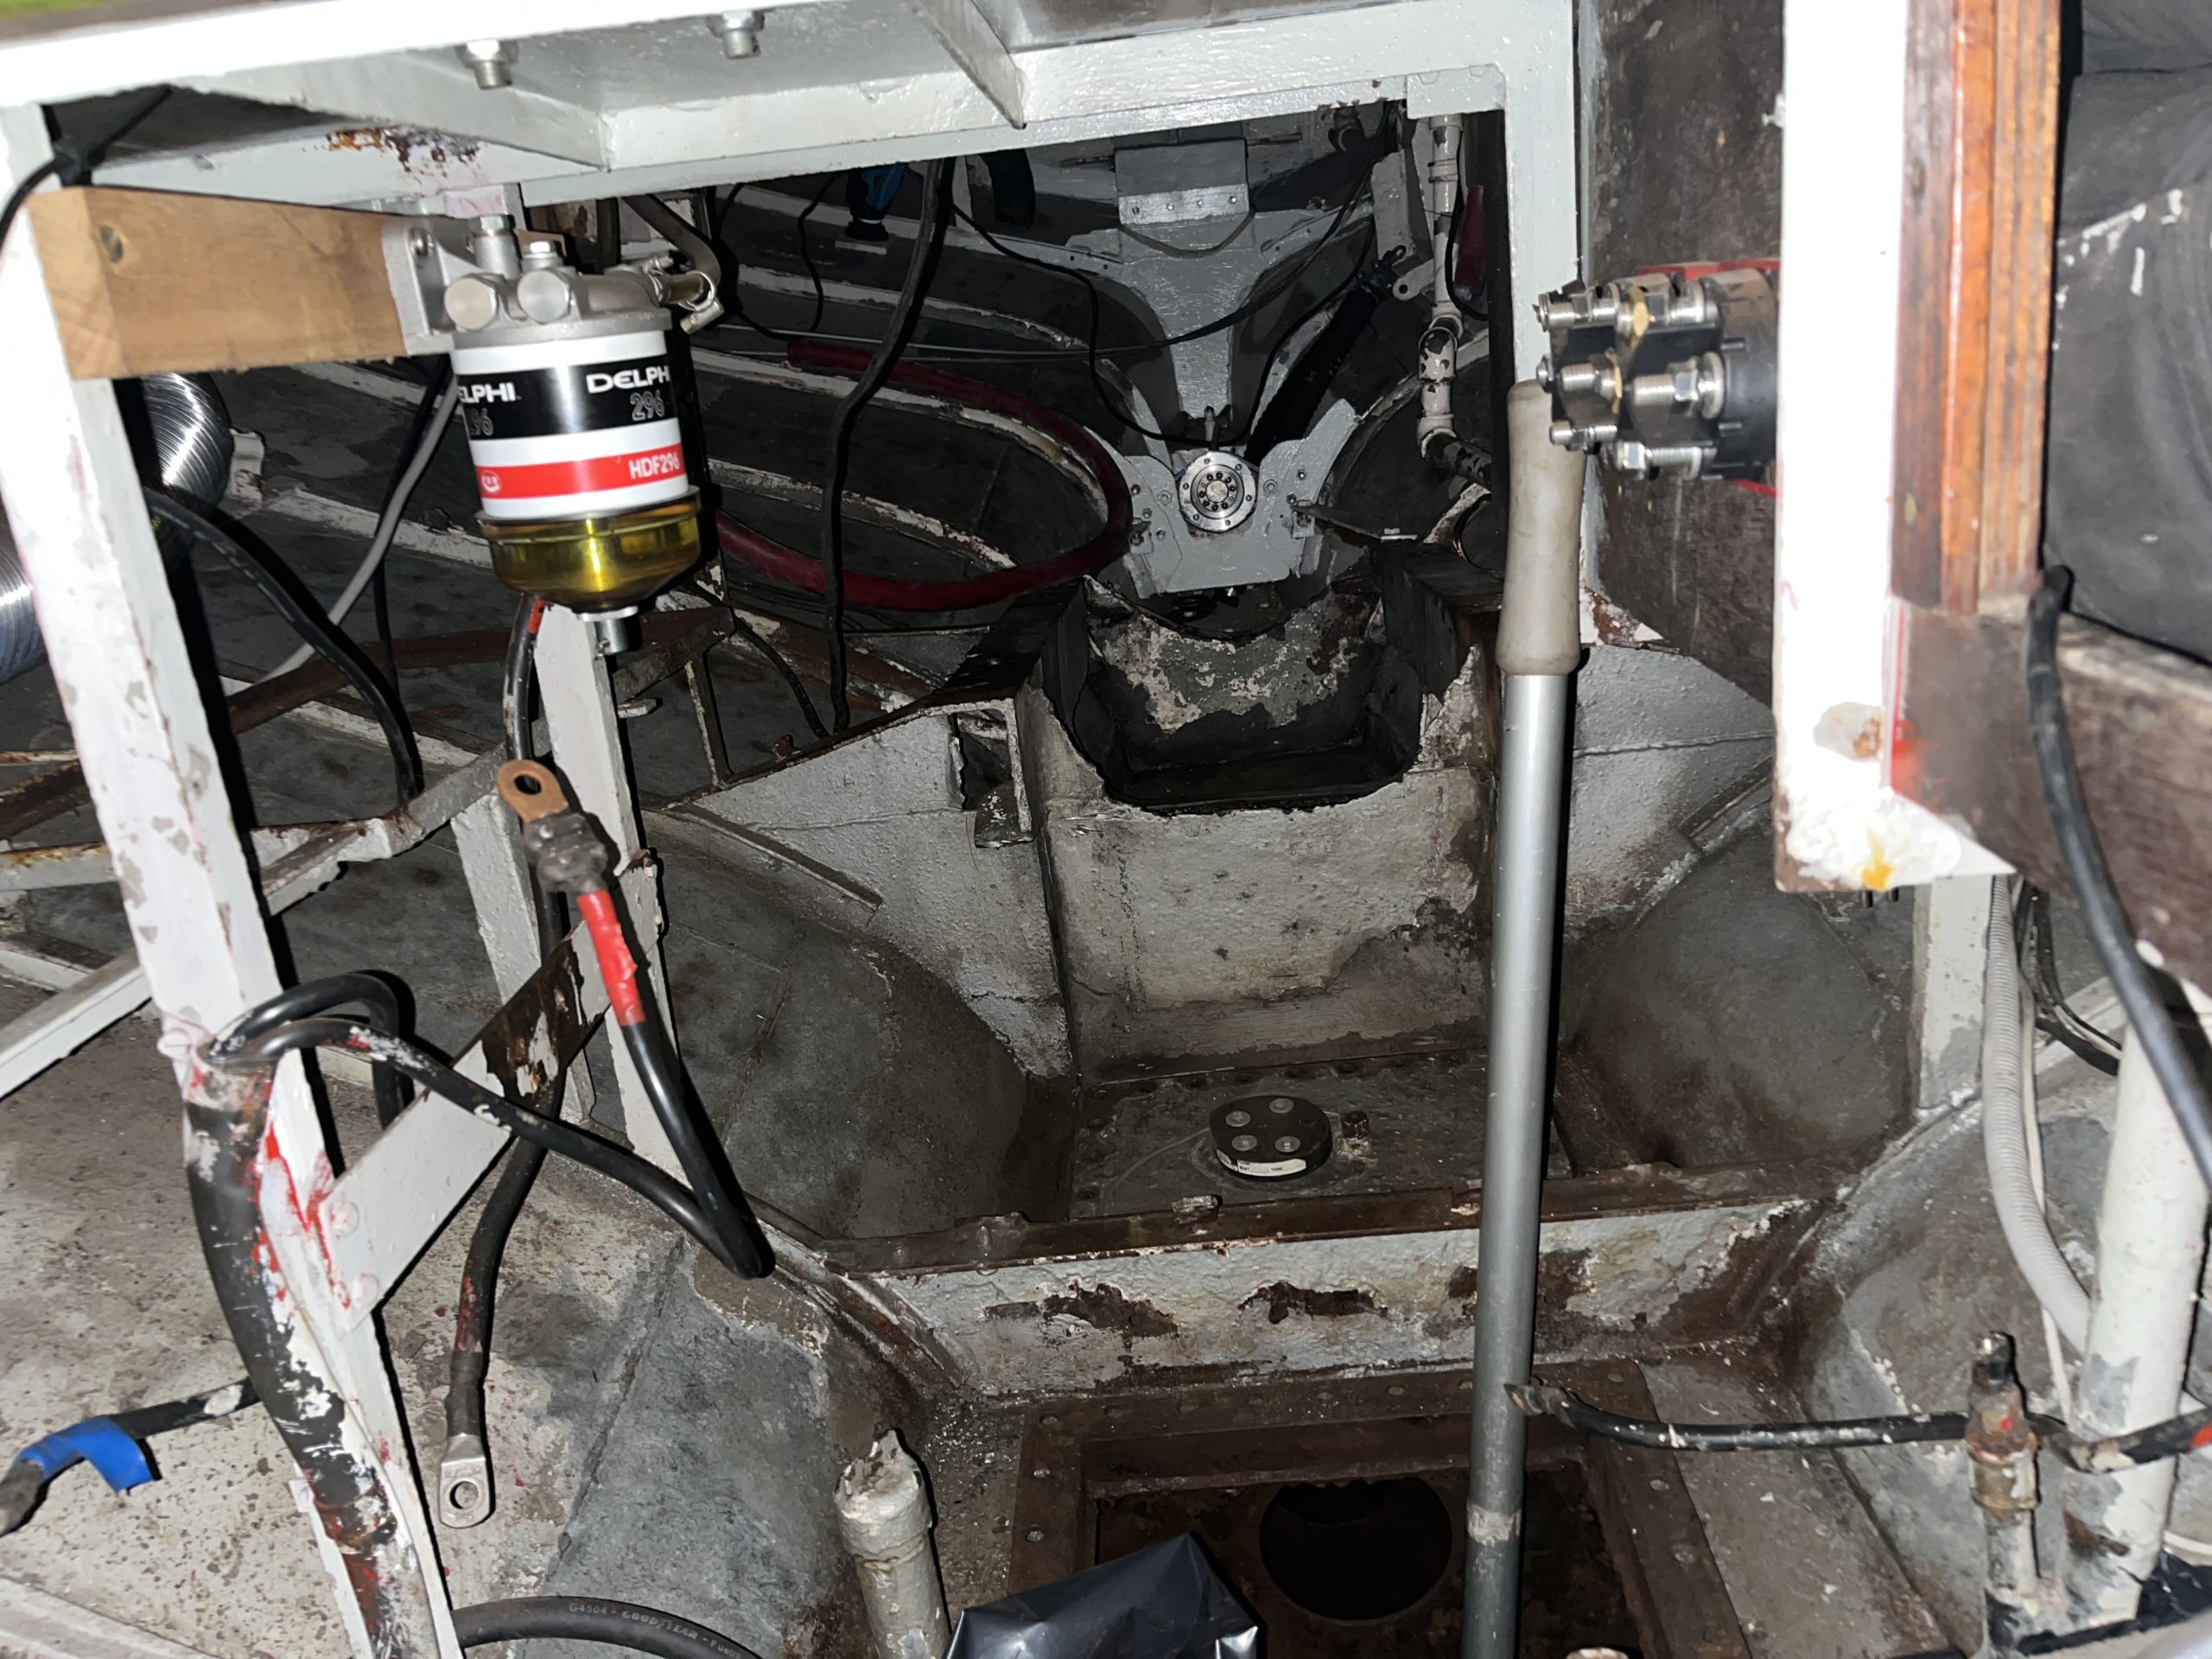
Ariadne has had her engine compartment washed, and CRC’s Bräkleen brake cleaning spray worked great as a detergent. No holes have been found around the engine or the frame tank, apart from the one that I located and patched in the spring of 2018. Then I put a temporary spot on it and now I’m going to remove it and fix it better. In practice, it means removing a piece from the hull below the waterline and opening the tank from the top and renewing the top plate of one arch gap. In addition, I will put two inspection hatches in the tank in addition to the original one. The tank is three spans long and the inspection hatch is only in one span. After this repair, the tank is easier to clean if necessary.
After washing, I removed the paint with a needle chipper to renew the painting. My appetite grew as I ate and I removed paint from a much larger area, because the needle chipper was easy to work with. Although accompanied by a fair amount of noise, the noise level was 117dB according to the smartwatch’s announcements. The surface still needs to be brushed/sanded after the needle chipper and then painted.
The work continues…
Moottori nousi Ariadnen noston yhteydessä peräkärryyn ja päätyi Inkooseen. Ennen talliin siirtoa pesin sen painepesurilla sillä sen verran siihen oli kertynyt vuosikymmenten saatossa likaa.
Moottorin kunto oli tarkoitus ensin selvittää ja sen jälkeen vaihtaa tarvittavat osat. Homma alkoi puristusmittauksilla. Mittasin paineita ensin kiinanihmeellä eli perinteisellä mekaanisella painemittarilla jossa oli takaiskuventtiili, mutta mittari näytti koko ajan nollaa. Niinpä niin. Vaihdoin oikeanmerkkiseen yleisimittariin ja sen paineanturiin ja sain riittävän hyviä lukemia kun moottoria startilla pyöritin. Startti tosin otti enemmän virtaa kuin mitä auton apukäynnistyskaapelit suostuivat suosiolla välittämään eli klipsit alkoivat hehkua…. Pulttasin Ariadnessa olleet starttikaapelit kiinni ja savun muodostus hävisi ja mese pyöri. Sain suuntaa antavia painearvoja - mootori oli kylmä - ja niitä tulkitsemalla näytti siltä, että nelossylinteri oli hiukan huonomassa hapessa kuin muut. Sen paineet olivat 20% alle muiden keskiarvon.
OM636 tallissa
Purkamisen aloitin tyhjentämällä öljyt ja jäähdytysnesteen ja sen jälkeen tallin lattia alkoi täyttyä erinäisistä moottorin osista kuten lämmönvaihtimesta, imusarjasta, startista, laturista, öljyputkista, ruiskupumpusta, sen putkista ja suuttimista.
Kun kaikki ulkopuoliset osat olivat irti, oli vuorossa sylinterin kansi. Aluksi yritin avata kannen pultteja tavallisella hylsyvääntimellä mutta ensimmäistä pulttia vääntäessäni päätin pikaisen tuumauksen jälkeen käyttää iskevää mutterinväännintä - Makitaa tietty. Homma muuttui kevyeksi ja pultit aukesivat vaivatta, smarter not harder.
Tähän mennessä moottori oli ollut tekemäni pukin päällä. Purkaminen edellytti hiukan erilaista pukkia ja päädyin hakemaan Motonetista moottoripukin jossa sitä pystyisi pyörittelemään. Sitä varten piti irrottaa vielä vauhtipyörä ja sen kotelo koska moottori pultattiin pukkiin kotelon pulttien rei’istä.
Esikammion rakenne
Kun kansi lievän pakottamisen jälkeen irtosi sylinterilohkosta oli vuorossa kannessa olevat sylinterien esikammiot. Vanhemmat dieselmoottorithan ovat tyypillisesti esikammiodieseleitä joissa polttoaine ruiskutetaan pieneen esikammioon ja josta palaminen alkaa toisin kuin uusissa suoraruiskutusdieseleissä joissa polttoaine ruiskutetaan suoraan pääpalotilaan. Esikammioiden ja niitä paikoillaan pitävien kierrerenkaiden irrottamiseen oli tietenkin olemassa erikoistyökalut. Olin jo laittanut ne saksalaisessa Unimog-nettikaupassa ostoskärryyn, mutta kun toimitusosoitteeksi ei Suomea löytynyt tavailin toimitusehtoja tarkemmin. Toimitus vain Saksaan. Tilaanko ja sovin kauppiaan kanssa, että esimerkiksi DHL tai Fedex tulee noutamaan? Kuulostaa monimutkaiselta ja työläältä. Duunimatka Saksaan? Vaikea keksiä edes tekosyytä matkaan. Ajanko Saksaan edestakaisin tyyliin Ariadnen kunnostuskeikat Pösöllä Hampuriin? Ei innosta. Mistä muualta löytyisi ulosvedin, jossa edes ulkokierre M22x1,5mm OM636:n kierrerengasta varten? ebay.de? Kyllä. Vorkammer Gewindering ausdreh Werkzeug OM 615,616,621,636 tilaten. Harmittavaa oli, ettei esikammion irrotustyökalua löytynyt mistään, siinähän oli tietenkin eri kierre ulosvetoa varten. Viikon kuluttua noudin tilaamani paketin Lantiksesta ja hyvin työkalu pelasi. Kierrerenkaat aukesivat ja Makitan 1000Nm iskevä mutterinväännin osoittautui taas oikeaksi työkaluksi, muuten ei hommasta olisi tullut mitään. Yksi renkaista oli niin kovaa kiinni, että se sai hiukan siipeensä ja täytynee tilata yksi uusi.
Kierrerenkaat olivat poissa ja nyt oli saatava esikammiot irti. Brittiläinen OM636 gurukin tarjosi eioota kun kyselin työkalua briteistä, mutta sanoi että ne lähtevät kevyesti naputtamalla. En edes yrittänyt sitä. Esikammion irrotustyökalua eikä mitään muutakaan - edes pultteja - vastaavalla M22x1,0mm kierteellä netistä löytynyt. Ei mitään hakutuloksia. Kunnes melkein tärppäsi. Alibabasta löytyi skootterin vauhtipyörän ulosvedinsarja jossa näytti olevan vetohylsyjä oikeilla kierteillä. Kiinasta tilaaminen ei kuitenkaan lopulta innostanut, ja onneksi bongasin vastaavan sarjan Motonetin valikoimissa kun hain sieltä skootterin moottorille tarkoitettuja erikoistyökaluja.
Seuraavana päivänä ajoin duunimatkan varrella olevaan Motonetiin ja hain kyseisen sarjan ja kotiin päästyäni sulkeuduin talliin kokeilemaan. Holkki kiertyi nätisti esikammion sisäkierteeseen. Tämä hyvä. Tosin hankittu ulosvetosarja oletti, että ulosvetoholkin sisäreikään kierretään pultti ja kun se kiristetään pohjaan asti ja jatketaan kiristämistä holkki nousee. Omassa tapauksessa holkkia pitäisi saada ylöspäin tukeutumalla reiän ulkopuolelle eikä sisäpuolelle ja sitä varten kokeilin josko holkki ja esikammio mahtuisivat nousemaan 30mm hylsyn sisällä kun ulosvetopultti joka tuli hylsyn läpi ja tukeutui sen yläpitaan. Juuri ja juuri eli Ihan kuin tehty. Esikammiot eivät olleet enää millään muulla kuin 40 vuoden karstalla kiinni kannessa ja ne nousivatkin suht helposti eikä Makitan mutterinväännintäkään tarvittu.
Esikammioita pari
Esikammioissa on syttymisen helpottamiseksi ja palamisen parantamiseksi poikittaisessa tangossa pieni teräskuula jota kohti polttoaine suihkutetaan ja joka käynnistyksessä tehtävän hehkutuksen aikana kerää itseensä lämpöä (kts. kuva edellisellä sivulla). Neljännestä sylinteristä eli kaikkein karstaisimmasta sylinteristä oli kuula lähes kadonnut, toisesssa puoliksi ja muissa se oli paikoillaan. Todella outoa. Kadonnutta kuulan osaa ei löytynyt edes männän päältä eikä liioin jälkiä männästä joten se oli ilmeisesti päätynyt pakoventtiilin kautta pois. Ostoslistaan tuli yksi rivi lisää, esikammioita kaksi - jos sellaisia jostain löytyy. Irrotin vielä venttiiilit, jotka olivat kaikki kunnossa ja jätin kannen odottamaan pajalle vientiä.
Jäljellä oli enää sylinterilohko jossa oli öljypohja, kampi- ja nokka-akseli sekä männät ja öljypumppu paikoillaan. Pyöräytin moottorin ylösalaisin ja melko pian öljypohja irtosi pulttien irrottamisen jälkeen pienellä koputtelulla ja kampiakseli oli näkyvissä. Seuraavaksi irtosivat kiertokanget kampiakselista ja sen jälkeen kampiakselin laakerit ja nostin akselin pois. Vedin männät kiertokankineen pois ja sylinterilohkossa oli vain nokka-akseli paikoillaan. Sylinterit kaipaavat kevyttää porausta/hoonausta sillä jo aiemmin mainittu nelossylinteri oli kaikkein kulunein, siinä tuntui pieni olake - pari kymmenystä - yläkuolokohdassa.
Tässä vaiheessa heitän pallon koneistamolle joka lähitulevaisuudessa käy kannen ja lohkon läpi ja tekee osansa eli kannen tarkistuksen, venttiilien hionnan ja lohkon porauksen. Toivottavasti ei tarvitse sylinteriputkia alkaa vaihtaa, sillä niitä ei hirveän paljoa ole tarjolla. Outoa, sillä eihän moottori ole kuin 44 vuotta vanha.
Työmaata riittää
Ariadnella on moottoritila pesty, ja pesuaineena CRC:n Bräkleen jarrujen puhdistusspray toimi mainiosti. Moottorin eikä runkotankin ympäristössä ole reikiä löytynyt sen yhden kohdan lisäksi, jonka paikallistin ja paikkasin keväällä 2018. Silloin laitoin siihen väliaikaisen paikan ja nyt otan sen pois ja korjaan paremmin. Käytännössä se tarkoittaa palan poistamista rungosta vesilinjan alapuolelta ja tankin avaamista päältä ja uusimalla yhden kaarivälin päälilevyn. Lisäksi laitan kaksi tarkistusluukkua tankkiin yhden alkuperäisen lisäksi. Tankkihan on kolmen kaarivälin mittainen ja tarkistusluukku ei ole kuin yhdessä kaarivälissä. Tämän pikkurempan jälkeen tankki on helpompi tarvittaessa puhdistaa helpommin.
Pesun jälkeen poistin maaleja neulahakkurilla maalauksen uusimista varten. Ruokahalu kasvoi syödessä ja poistin maaleja reilusti suuremmalta alalta, sillä neulahakkurilla homma sujui vaivattomasti. Tosin reilunpuoleisen metelin saattelemana, melutaso oli älykellon ilmoitusten mukaan 117dB. Neulahakkurin jäljiltä pitää pinta vielä harjata/hioa ja sen jälkeen maalata.
Homma jatkuu…